Hand Stitching Text

I always avoided hand embroidering any kind of lettering because I thought it would look awful. But it doesn’t, and there are lots of amazing things you can do with text.
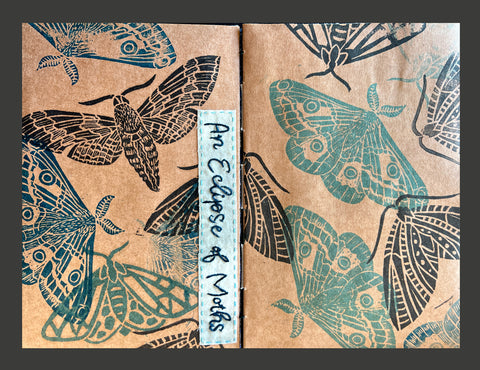
I wanted to add some text to this little book I've been working on. On this particular page, I block printed several different moths on the pages. In one area I wanted to cover up where the block didn't print over the fold in the book.
In looking up what a group of moths was called I learned that they are an eclipse of moths. I really liked that term, so I decided to try to hand embroider the words on a little swatch of fabric and add it to the pages.

Now I am not good at all with lettering. So I found a font on my computer I really liked and printed it out in the correct size: the entire piece finished out at 1"w x 6" long. That's not a very easy size of fabric to stitch on, so I cut the fabric at 4" x 9" so I would have something to hold onto.
You can also check out ideas for text here, and you can join for free: Canva
Next I taped the pattern above to my lightbox, or you could use a window, pinned the fabric to the pattern, and traced off the lettering and the rectangle onto my fabric using a Frixion heat erasable pen.
Then I used two strands of a dark blue embroidery floss to stitch my letters. I stopped and started again where there was a break or space in the lettering.


The stitch I used was a Split Stitch. It is exactly like the Stem Stitch, but the only exception is that instead of coming back up in the same hole where the previous stitch ended, you bring your needle up in the thread of the last stitch. That way you don't get those wonky threads on sharp curves.
Here's a video I made for you on exactly how to do the Split Stitch.
To finish my piece, I added a little border around the stitched text using a Running Stitch, trimmed the fabric as close as possible to the stitching, and used a fabric glue to glue it to my page.
