2. How to Mark Your Hand Embroidery Projects
This is Part 2 of a 5 Part Series
How do you mark hand embroidery projects? The easy way is usually my answer. I will share with you what I have learned after lots of trying every possible way. Always do a little test swatch first to make sure the marks will come out of your fabric.And the methods outlined below are what I have settled on.
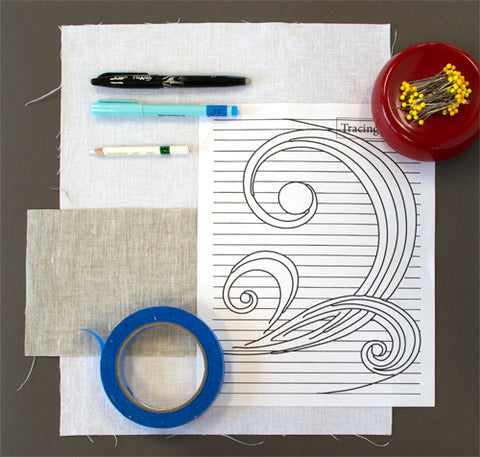
In the photo above are all the things I use for marking my work. They are listed here in order of importance.
- Fabric, allow at least an extra 1-2" minimum around the outside
- Pattern, I draw my designs in pencil and then go over my lines with a Fine Point Sharpie
- Straight pins
- Fabric marker
- Painter's or masking tape
I work mostly on linen, but I also use silk and cotton fabrics. Linen is pretty loosely woven and has lots of texture, so it can be a little harder to mark than a cotton fabric.
I use three types of markers, and sometimes I use more than one type of marker on a piece. It depends on the fabrics used, how you are going to finish the piece, and whether or not you can get it wet.
- Frixion Pens, heat erasable, for marking on light colored fabrics All Markers (look carefully at that package if you are buying them somewhere else. Amazon has lots of different versions)
- Fine LIne Blue Marker, water-erasable; Make sure your fabrics are not going to bleed at all when they get wet. Note: I have used the same exact brand of marker for 20 years without any problems, but they have been switched to another supplier. I am currently waiting for an order to arrive.
- White Stabilo #8052 Pencil, water-erasable; For marking on dark fabrics.
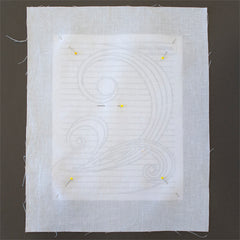
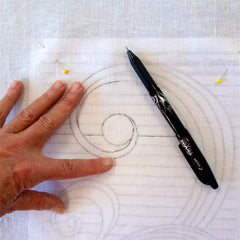
If your pattern is drawn or printed dark enough and you are using light colored fabric, you should be able to see through it well enough to transfer your marks. Don't try to add too much detail, as you will only end up with a mess. Pin your fabric to the paper pattern. Hold the fabric taut with the fingers of your left hand and mark carefully with either the Frixion or the Blue Marker.
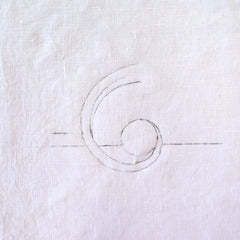
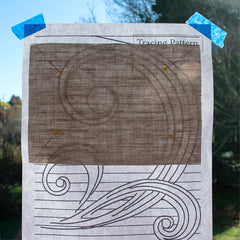
On the left is what your markings should look like on white or light colored fabric. The image on the left is how you would mark a fabric when you can't see the pattern through the fabric. As before, pin your fabric to the paper pattern, and use the painter's tape to tape it to a window. Or, of course use a light box if you have one. I do, but it is usually too much trouble to get it out. Again, see which works best; either the Frixion or Blue Line marker.
For marking very dark fabric, I use the white pencil listed above. Use the tape it to the window method, and mark. I only mark the basic lines to get started, and then as I work I will usually add more lines as needed. That covers pretty well everything, and now I will briefly explain how to remove your marks.
Frixion- hold your iron slightly above the surface of your work and move it around slowly until all marks disappear. Try using steam if necessary. You can also gently steam it from the back side to remove the ink.
Blue Marker- I spray my piece with water and wait for a couple of minutes to see if the marks are gone. If not, I use a piece of white cotton that has been dipped in water and gently dab the marks that are more stubborn.
White Pencil- Again, I use the white cotton scrap dipped in water and gently dab the marks to remove. Usually by the time I am done the marks are pretty well gone anyway.
please leave a comment if you found this post to be helpful.